Do you want to start a blog but don’t know how?
In this step-by-step guide, I will show you how to add a blog post in WordPress. WordPress is one of the most popular blogging platforms available, and it’s easy to use.
You can create a blog for free on WordPress.org, in this article I will show you how to create and add a blog post in WordPress.I will also show you how to format your posts and add images and videos.
So without wasting time let’s get started!
What is a Blog Post?
A blog post is an article that you write and publish on your blog. A blog post can be about anything, from your latest holiday to a review of a restaurant you visited.
Blog posts are usually displayed in reverse chronological order, with the most recent post at the top of the page.
Creating a new blog post in WordPress is easy. In this article, I will show you how to create and add blog Post in WordPress step by step.I will also show you how to format your posts and add images and videos. So without wasting time let’s get started!
What is the difference between WordPress posts and pages?
Posts are displayed in reverse chronological order on your blog, which means that the most recent post is at the top of the page.
Pages are static and they don’t change. For example, your About page or Contact page would be a static page.
Lets Understand Post in WordPress
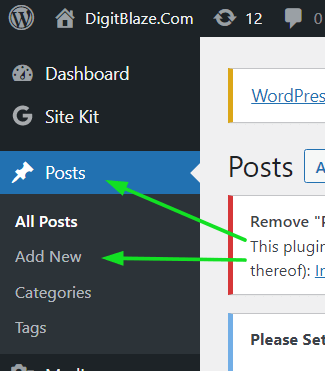
The first thing that you do is to log in and go to the post section in the WordPress dashboard. Let’s understand each section that comes under Post.
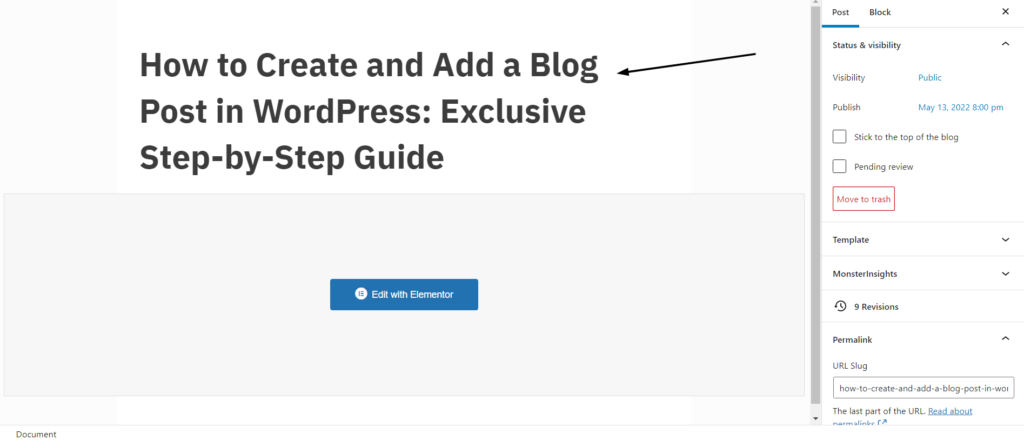
Post Title:
This is the headline of your post. Write a catchy headline that will make people want to read your post. Post titles as in the headlines are very important for SEO as good post titles help you with a good click-through rate.
Post Content
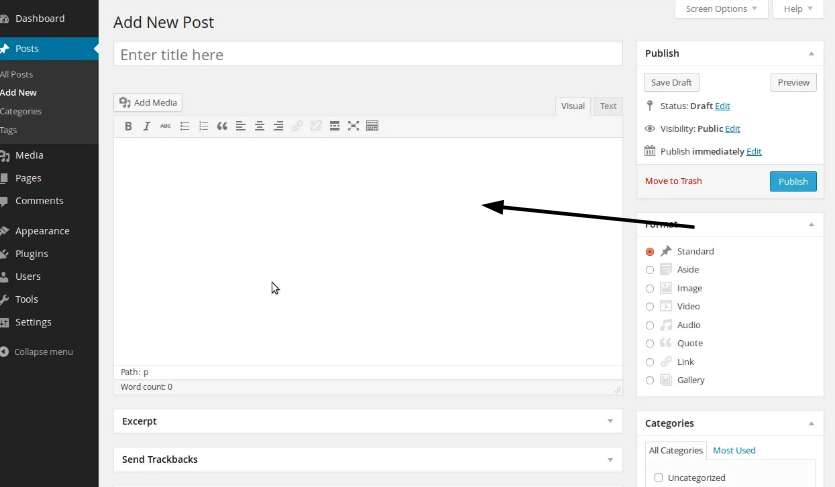
Once done with research and writing a catchy headline, next step is to write content for your post.
WordPress has a WYSIWYG (What You See Is What You Get) editor, which makes it easy to format your posts.
You can bold, italicize, and underline text, as well as add links, images, and videos.
You can also use the elementor WordPress plugin to make your posts look more attractive.
Post excerpt
An excerpt is a short summary of your post that appears on the blog home page and in search results.
You can leave this blank if you want, but I recommend adding an excerpt for each post.
To add an excerpt, scroll down to the Excerpt section and add a short summary of your post.

Categories and tags
Categories and tags help people find your posts.
For example, if you have a blog about travel, you might have categories for different destinations, and tags for different activities.
Categories and tags help you to organize your posts, and they make it easier for people to find the posts they’re interested in.
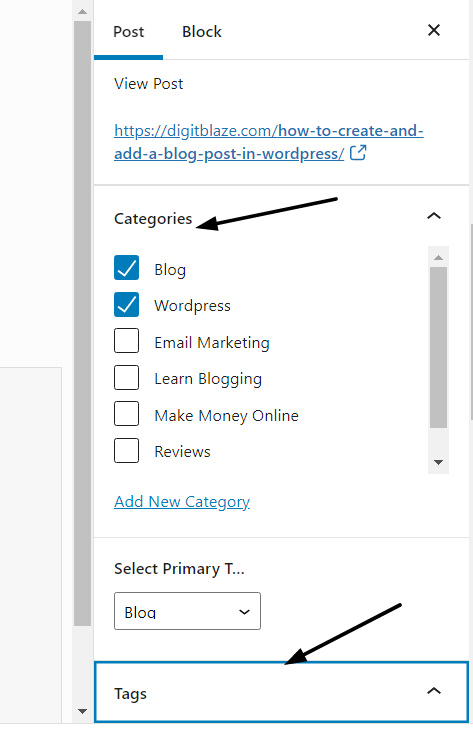
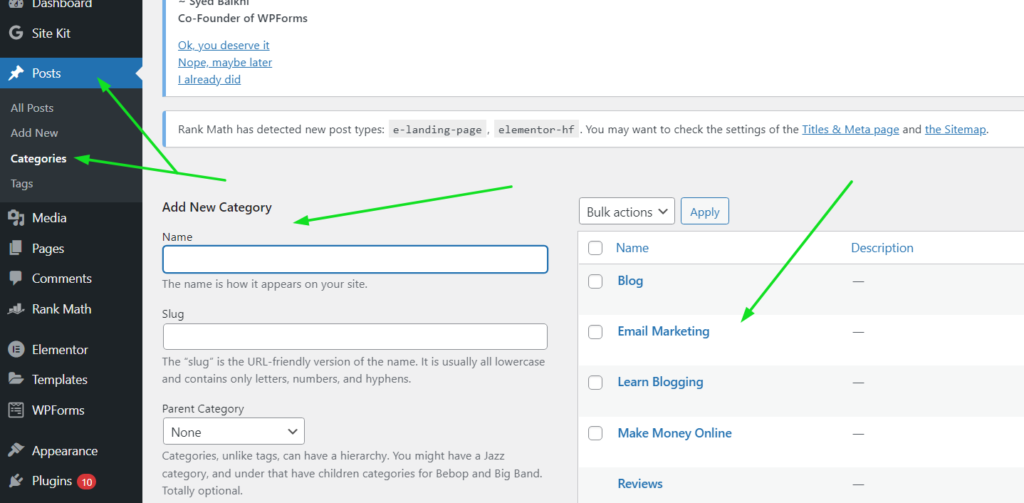
You can add a new category by clicking on the Add New Category link.
To add a new tag, simply type the tag into the Tag field and click on the Add button.
Post Permalink
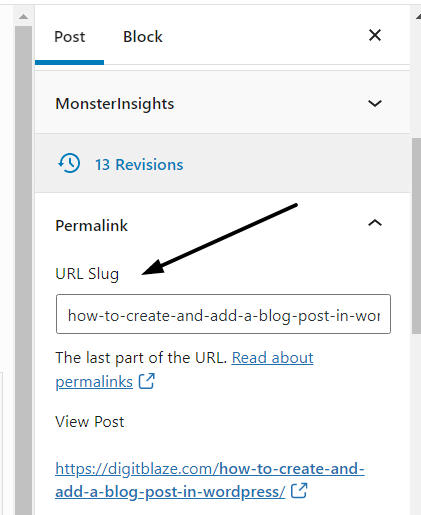
The permalink is the URL of your post.
By default, WordPress creates a permalink based on the title of your post.
For example, if your post title is “How to Add a Blog Post in WordPress”, the permalink would be something like this:
yourblog.com/how-to-add-a-blog-post-in-wordpress/
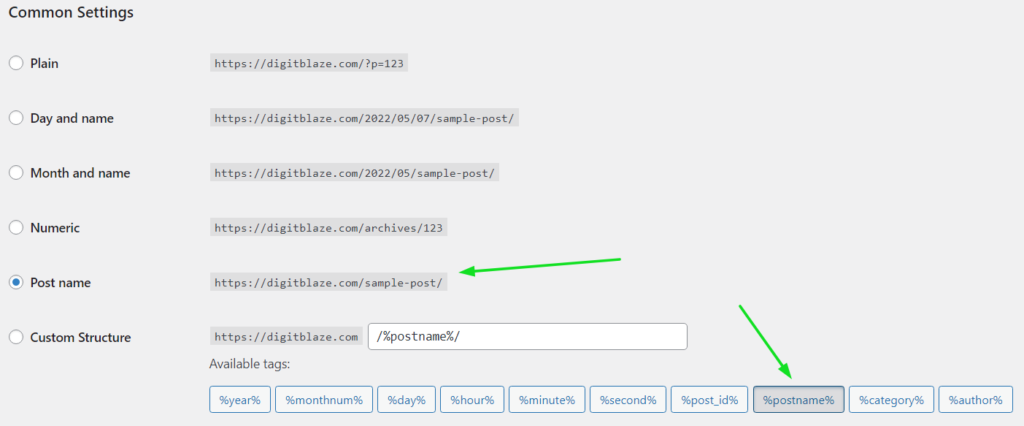
You can change the permalink if you want, my recommendation would be to go for the Post name (%postname%) option as this option is good for SEO.
Post Author
The post author is the person who wrote the post.
By default, WordPress will show your name as the author of the post.
If you have multiple authors on your blog, you can change the author by clicking on the Change button.
Publish Date and Status
The publish date is the date when you published your post.
The status of your post can be either Published or Draft.
A draft is a post that you have not published yet.
You can save a post as a draft by clicking on the Save Draft button.
To publish a post, simply click on the Publish button.
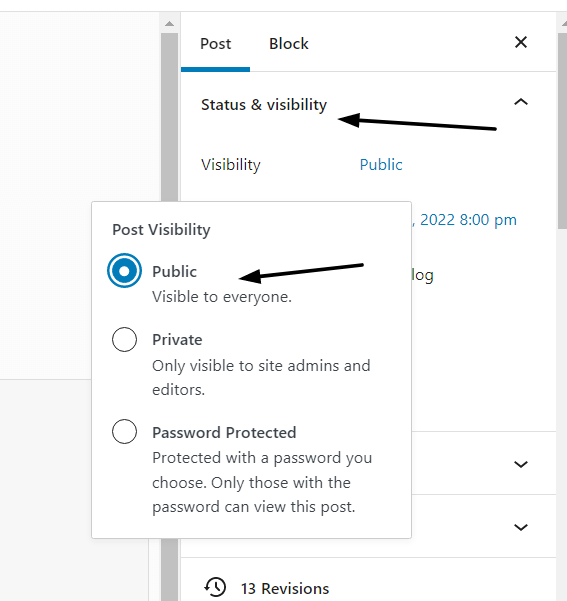
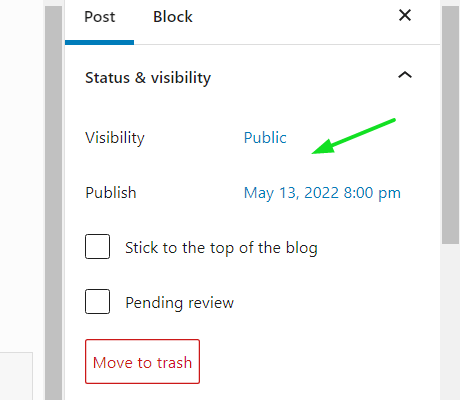
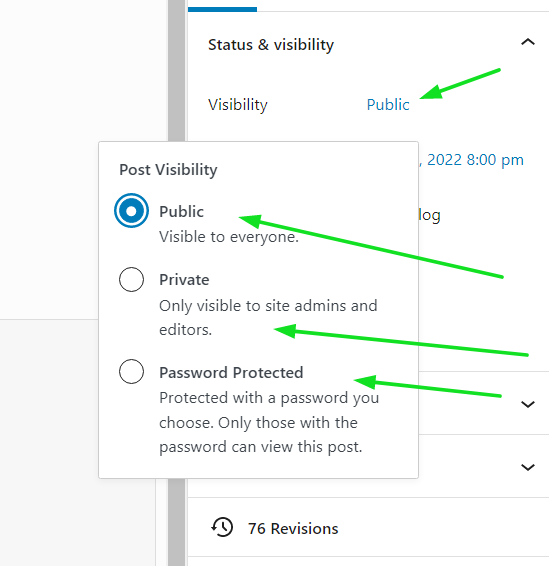
Visibility: Public, Private, or Password Protected
The visibility of your post determines who can see it.
By default, WordPress posts are public, which means that anyone can see them.
If you want to keep a post private, you can change the visibility to Private.
Password protected posts are only accessible by people who know the password.
To change the visibility of your post, simply click on the Edit link next to Visibility.
Featured Image
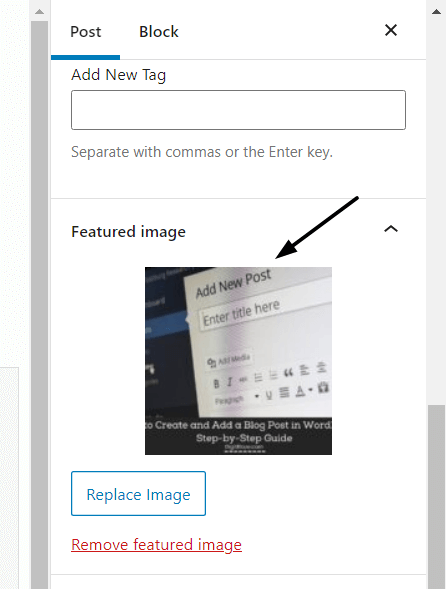
The featured image is the main image for your post.
It’s the image that appears at the top of your post, and in search results.
To add a featured image, scroll down to the Featured Image section and click on the Add New Image button.
Select the image you want to use, and then click on the Set Featured Image button.
How to create and add blog post in WordPress
Step:1 Navigate to Post Page
The first thing you need to do is get your article fully ready for publishing. Once you are done with that, you need to login to your WordPress account.
The very first thing you will see is the WordPress dashboard, now let’s see step by step how to use all the sections to create and add a blog post in WordPress.
Step:2 Add Title and Content
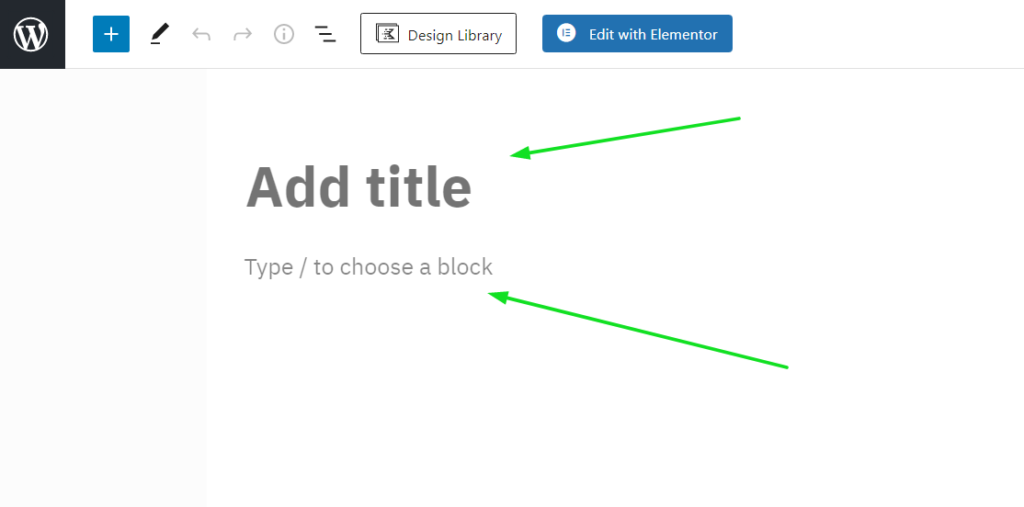
The next step is to add your title to the main headline of your blog post which will be seen on the search engine page.
In this section, you can start writing your blog post in the WordPress editor.
When editing uses the heading tags properly like H1 for the main headline, H2 for subheadings, and so on.
This will help Google to understand your content properly.
For normal text in the content use paragraph and heading and for subheadings use Heading tags like H1 H2 H3 H4.
You can write your blog post in Google Docs and copy-paste it directly to wordpress.
Add images & videos in between the blog post to make it more visually appealing but don’t add too many as this will make your page heavy and slow.
Step:3 Add Images & Videos
Images & videos are an important part of the blog post as it makes your content more visually appealing and help you explain things better.
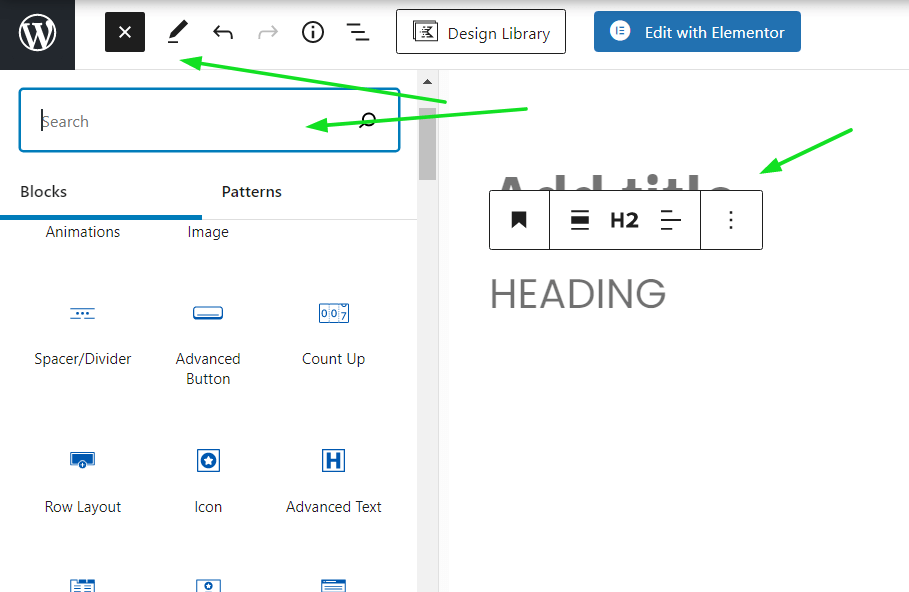
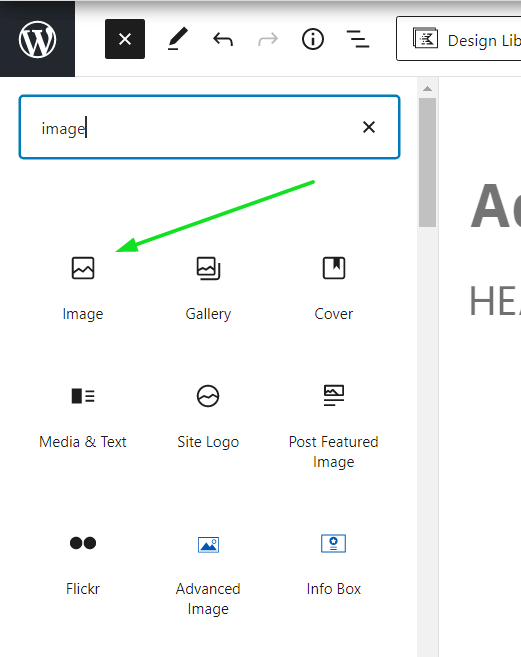
To add images click on the + sign present in the left sidebar and then select the image option or you can simply drag and drop the image.
Make sure the size of your images are small as the large size images tend slow down your site.
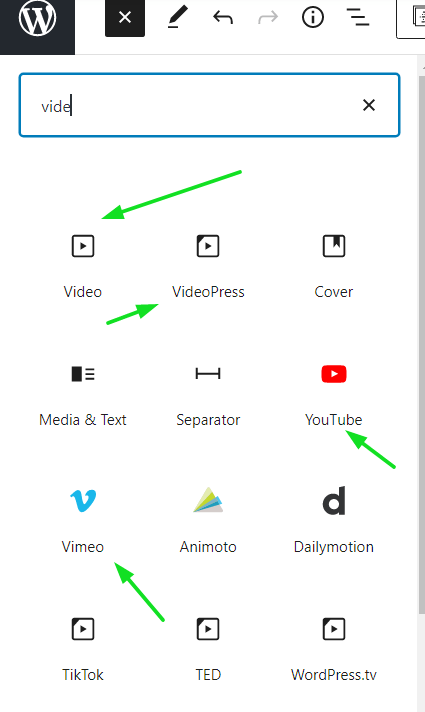
You can also add videos by clicking on the video icon and then entering the URL of the video you want to add.
There are multiple ways to add video in WordPress blog posts like youtube, Vimeo, etc
Step:4 Set Featured Image
A featured image is the main image for your post which appears on the top of your blog post and in search results.
To add a featured image, scroll down to the “Featured Image” section and click on the “Add New Image” button.
Add alt text to your image for better search engine optimization.
Step:5 Set Permalink for better SEO
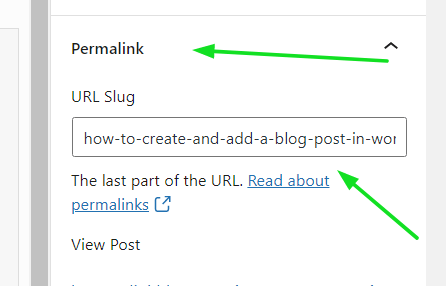
A permalink is the URL of your blog post which appears on the search engine page.
It’s important to set a permalink for your blog post as it helps in better search engine optimization.
To set a permalink, simply click on the “Edit” button next to the “Permalink”
Keep your permalink short and very specific and include your focus keyword in it.
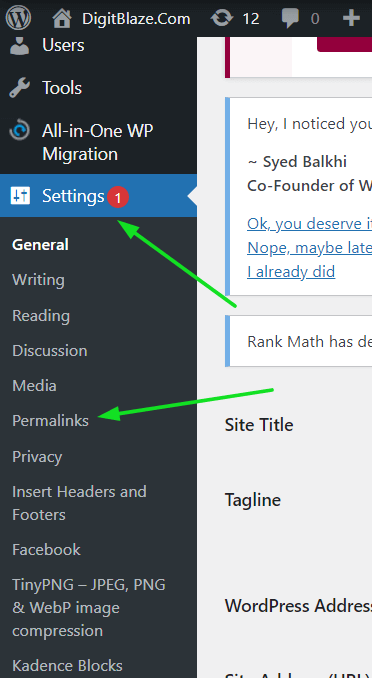
To change the type of permalink go to Dashboard>Setting>Permalink>choose Post Name type
Step:6 Set Categories & Tags
Categories & tags are used to categorize your blog post and make it easy for the users to find related content on your website.
To set categories, simply scroll down to the “Categories” section and select the relevant categories for your blog post.
To add tags, simply type in the relevant keywords in the “Tags” section and then click on the “Add” button.
This is one of the important features that you get in WordPress as it enhances the user experience on your website and also improves the use engagement by helping them to navigate to other articles easily.
The default category is always uncategorized, remember to change it according to the nature of your post.
Don’t make unnecessary categories in your menu, just keep it simple.
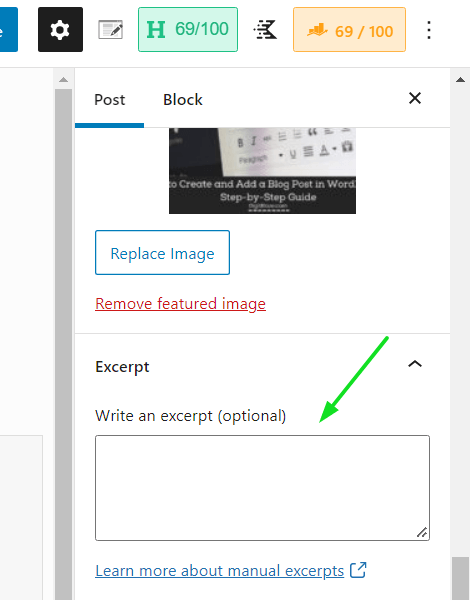
Step:7 Add Excerpt for better SEO
An excerpt is a short summary of your blog post which appears on the search engine page.
It’s important to add an excerpt for your blog post as it helps in better search engine optimization.
To add an excerpt, simply scroll down to the “Excerpt” section and type in a short summary of your blog post.
Make sure you keep your excerpt short and to the point.
If you do not write the excerpt by yourself then the WordPress will automatically take the first few lines of your blog post as an excerpt.
Personally I don’t like this idea as the first few lines of the blog post might not be relevant to what the article is about.
Step:8 Preview and Check for Errors
Once you are done writing your blog post, it’s time to check for any errors.
To do so, simply click on the “Preview” button present at the top right corner of the page.
This will open up your blog post in a new tab and you can check for any spelling or grammatical errors.
Make sure you check all the links in your blog post and also check the images to make sure they are appearing properly.
Once you are done with the preview, simply click on the “Publish” button present at the top right corner of the page.
You get to see preview in three types of devices like desktop, tablet, and mobile.
It’s important to check for errors in all the devices as it will give you a clear idea of how your blog post will appear on different screen sizes.

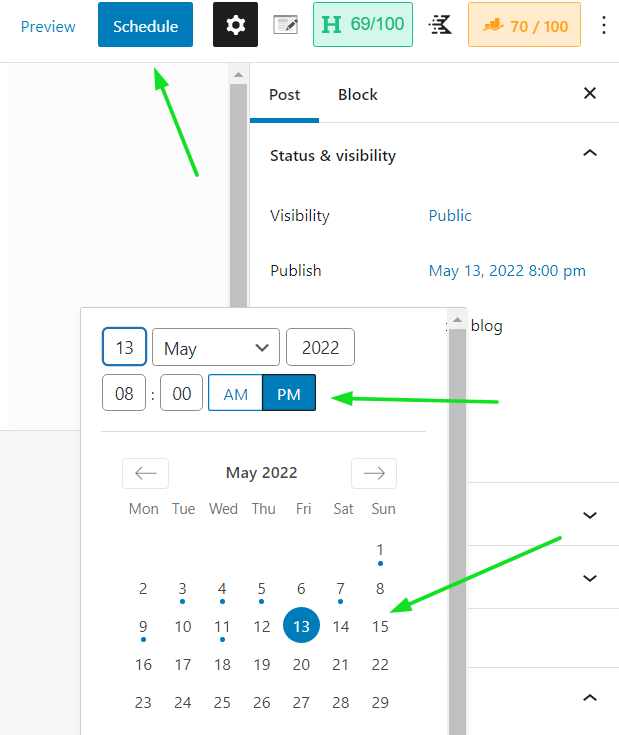
Step:9 Publish or Schedule the Post
Once you are done with the preview, simply click on the “Publish” button present at the top right corner of the page.
You can also schedule your blog post to be published at a later date by clicking on the “Schedule” button.
If you are writing articles in bulk then you can also use the “Bulk Schedule” feature to schedule multiple blog posts at once.
This is a very useful feature as it allows you to space out your content and have a consistent publishing schedule.
Once you are done scheduling, simply click on the “Publish” button present at the top right corner of the page.
You will see a message saying “Post published successfully.”
Final Thoughts
That’s it! You have successfully published your first blog post in WordPress.
I hope this article helped you learn how to Create and Add a blog post in WordPress.
Now that you know how to add a blog post in WordPress, I hope you can see how easy it is to use this platform to get your thoughts and ideas out there for the world to see!
To know more read these articles
20 Different Types Of Blog Posts To Drive More Traffic To Your Blog Website

