Google Search Console - The Ultimate Guide for Best Free SEO Tool in 2022

What is Google Search Console?
Google search console (GSC) is a free tool by Google, which is used as a website analytics tool, which is different from the Google Analytics tool.
The tool is widely used by SEO professionals, website owners, developers to monitor How their Website is performing, and what they can do to bring the more relevant organic traffic to their sites.
This is one of the best free SEO tool in the market right now.
The tool was first launched in 2001 and was named Google Webmaster Tool.
In 2015 the tool was renamed from Google Webmaster Tool to Google Search Console
GSC is the best tool to monitor your organic online presence.
The tool is helpful mainly in four ways
- To learn how Google is crawling and indexing your content
- Alerts you about the errors on the site that needs fixing
- Submitting your content to Google index
- Monitor the search performance like the channels they are coming from eg organic, paid, direct. Social and also search trends based on queries, pages, countries, and more.
How to Register website to Google Search Console?
To get started with GSC is very simple. Just go to Google search engine and search for Google search console.
Once you are on the homepage, you will have to login into GSC, you can do that using any existing account.
Once you get inside GSC the very first you have to do is to add your domain to GSC to verify your ownership of the domain property.
Just follow these steps
- Sign in to your Google account.
- Go to Google Search Console.
- Click “Add a property.”
- Choose “Website” from the drop-down menu and enter the URL of your site. Make sure you’re using the exact URL that appears in the browser bar.
- Click “Continue.”
- Pick a way to verify you own your website (HTML file upload, domain name provider, HTML tag, GA tracking code, or GTM container snippet).
- If your site supports both HTTP:// and HTTPS://, add both as separate sites. You must also add each domain (for example, digitblaze.com, blog.digitblaze.com, and www.prod-review.com).
One thing you need to understand is, even if you don’t register to GSC Google will still crawl your site and will collect data slowly and maybe even rank your posts in the future,
But as a beginner you register to GSC so that you make your site search friendly and get indexed fast and let Google know that your site exists, helping you get rank fast.
How to Verify Domain on Google Search Console?
There are five ways you can verify your Domain Property.
- HTML file upload: Upload a verification HTML file to a specific location of your website in the cPanel File Manager. This method is a little tedious for a beginner.
- Domain name provider: Sign in to your domain registrar (like GoDaddy, Namecheap, or hostinger), and verify your site directly from GSC or add a DNS TXT or CNAME record.
- HTML tag: Add atag to thesection of a specific page’s HTML code. You can do this by using simple pluginHeaders and Footers.
This is the easiest method to verify.
- Google Analytics tracking code: Copy the GA tracking code that you use on your site. (You need “edit” permission in GA for this option.)
- Google Tag Manager container snippet code: Copy the GTM container snippet code associated with your site. (You need View, Edit, and Manage container-level permissions in GTM for this option.)
There are 3 plugins that will help you with Google Site Verification.
- Rank Math SEO
This is my favorite SEO plugin. To verify your site with Google Search Console using this plugin is very simple.
Just go to Rank Math > General Settings > Webmaster Tools > Google Search Console
- Yoast SEO
This is the most used SEO plugin and is very simple to use. To verify using this plugin you just have to go
Yoast SEO > General > Webmaster Tools > Google Search Console.
- Google Site Kit
To verify with Google Site Kit just go plugin and sign in with Google.
Google will ask you to verify your ownership of the property, once you are done with that, you get all GSC stats in your wordpress dashboard itself.
Let’s understand Google Search Console Dashboard and How to Use it?
- Overview – In this section, you get to see the basic overall stats from GSC like site performance, search console insights, coverage, experiences, etc.
- Performance – In this section, you get 4 different traffic stat in detail based on search queries, countries, pages, devices, search appearances, dates. Using this you will easily be able to identify your highest and lowest traffic
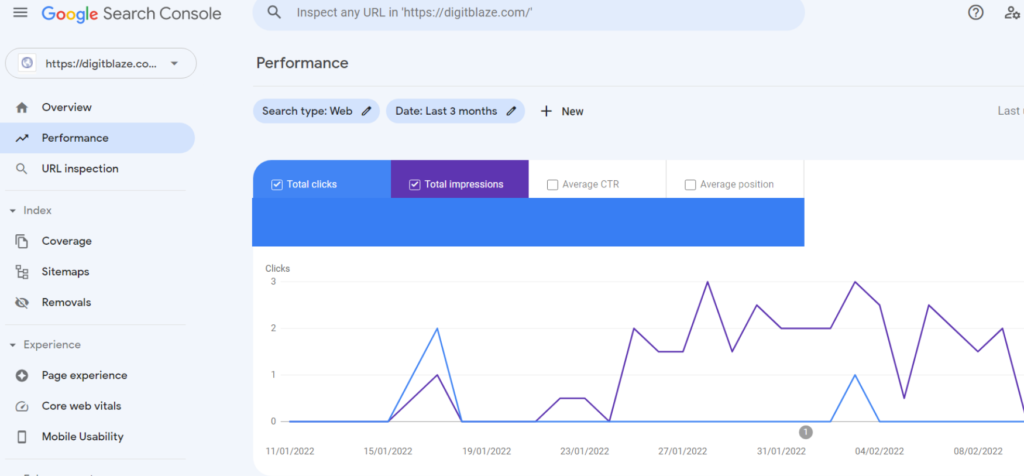
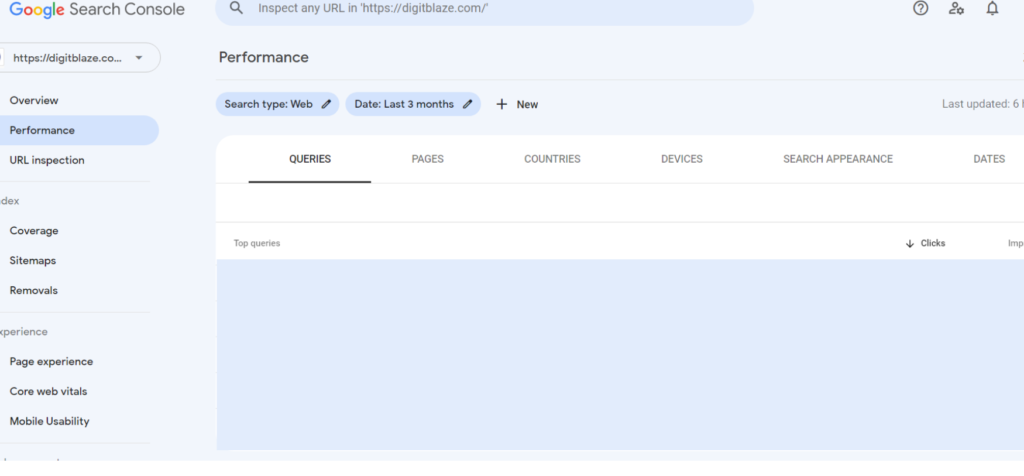
- Total Clicks – If the searcher clicks on your URL and gets on your site this is called a click. This is where you identify your highest-traffic pages. Basically, you understand how many people saw your post and willingly clicked on the URL to engage with the post.
To use this you just have to go Performance > Total Clicks > Pages
- Total Impressions – This is the number of times your URL appeared on the search result when someone searched for a specific query.
Basically, with impressions, you understand the reach of your post page, like how people saw your post page when searched for the query your content is around.
To use this go Performance > Impressions > queries or pages or countries. Etc
- Avg CTR – CTR, or click-through rate, is equal to Clicks divided by Impressions, multiplied by 100. If our post shows up in 100 searches and generates 50 clicks, our CTR would be 50%.
This stat is very important because let’s say you are getting 1000 impressions and only 10 clicks, then you need to fix something like maybe your headline is not catchy enough for people to take action and click on your URL.
To use this stat go Performance > CTR > queries or pages etc
- Avg Position – If your guide to Affiliate Marketing is ranking #2 for “Affiliate Marketing” and #4 for “Affiliate Program.” The average position for this URL would be 3.
If a page or set of pages starts ranking for additional keywords, the average position usually increases; after all, unless you’re ranking for the exact same position or better as your existing keywords, your “average” will get bigger.
To use this go Performance > Avg position > queries or pages etc
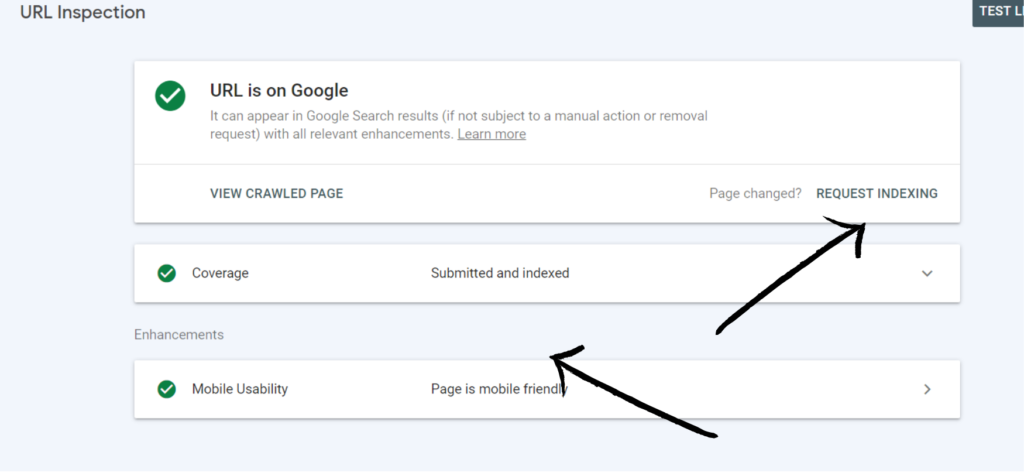
3. Url Inspection – The URL Inspection tool provides information about Google’s indexed version of a specific page. Information includes AMP errors, structured data errors, and indexing issues.
If any issue is found in this you need to go to the coverage tab to find the issue in depth.
If you want to index any of your posts you can request google using this section
4. Coverage –In this section, you get to know about which pages have been indexed that are valid or have got errors that need fixing or pages that have been excluded in the form of a list.
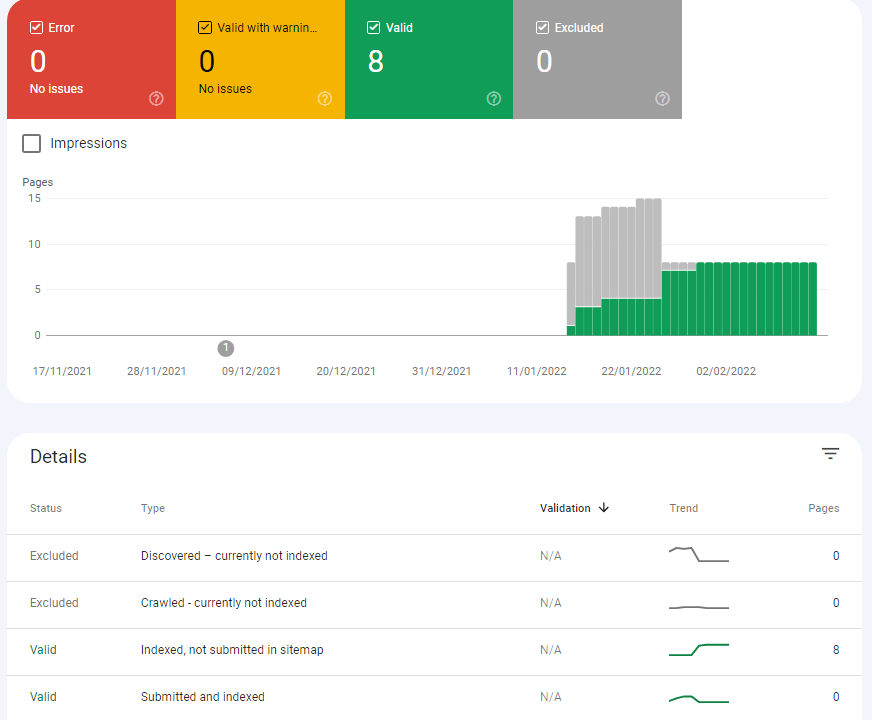
- Errors – Any errors with any page that need immediate fix will be displayed here.
- Valid with a warning – This is where you get the list of pages that are valid but have some warnings that need fixing.
- Valid – Here you get to see all the valid pages that have been crawled and ready to be indexed.
- Excluded – Here you get the list of pages that have been intentionally excluded by Google. Being excluded means these pages won’t appear on search results.
The main purpose to monitor this stat is to know the number of pages that have been indexed, as your main goal is to get most of your post indexed helping you to improve your organic traffic.
After posting a substantial number of posts if the number of errors is high the chance of your site getting ignored by Google becomes high.
So always keep a check on the errors and sort them as early as possible.
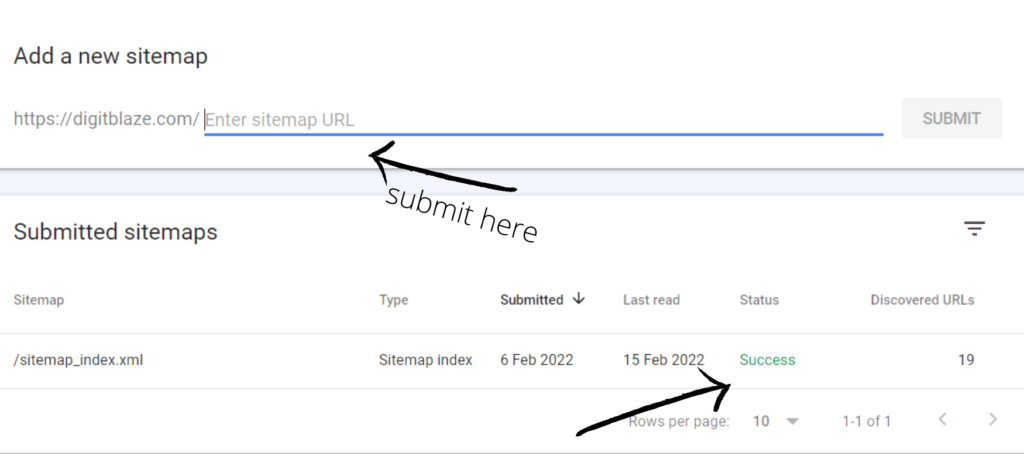
5. Sitemaps – This is a file that is created and submitted to the google search console, and with help of this file, Google crawls your pages, videos, images.
A sitemap essentially helps Google to figure out which of your content is unique and important.
This is very important for beginners as they have no backlinks, so the chances of being discovered by Google are less.
Submitting sitemap helps Google figure out you have posted a content post and should be crawled.
6. Removals – This tool enables site owners to temporarily hide a page from appearing in Google Search results.
7. Page experience – In this section your get the reports from which you can analyze the user experience on your site. You get reports of both mobile and desktop reports.
8. Core web vitals – In this section, you get reports based on three aspects of the site loading, visual stability, interactivity.
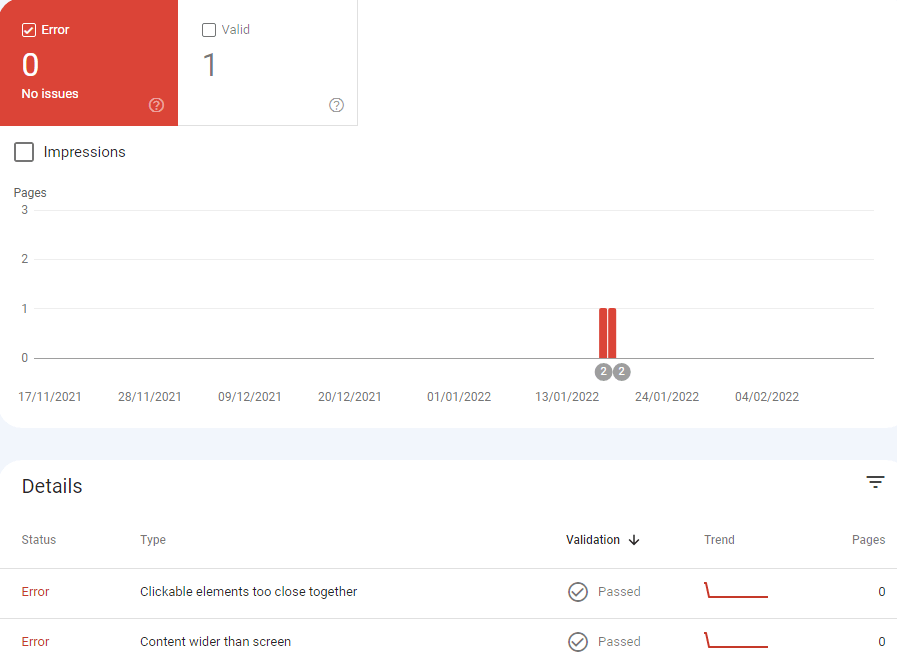
9. Mobile usability – In this section, you get reports that essentially help you to optimize the site experience on the mobile.
To optimize mobile experience is very important as most of the traffic will come from mobiles.
Any error that is damaging the mobile experience would be displayed here.
Eg: Font is too small, Images too close to the text, etc.
To sue this stat go Dashboard > Mobile usability
10. Links – In this section you get to know everything about internal links and external links ( backlinks ).
Internal links are your own post links that you have linked in your other post.
Backlinks are those links that you are getting from other sites, as in other sites is linking your post in their post.
Monitoring the backlinks is very important. From Google’s point of view if any site is getting more backlinks then it is a trustworthy site and has good content and helping that site get more preference from Google.
With help of this section, you can identify
- Total number of backlinks
- Which post is getting the most backlinks
- Which site has linked you the most
- Total number of internal links
- Which post has the highest internal link
Final Thoughts
I hope you found this post helpful. If you like this post please share it.
On the final note, I will suggest you start using the google search console, this is a powerful free SEO tool.
Don’t ignore the tool as you might find it a little overwhelming at first, take your time & explore it, and slowly you will learn why this is the best free SEO tool.
Confused about blog niche and keyword research? Take a look at these articles


